.png?height=120&name=Logotype+Lettrine%20-%20Horizontal%20-%20Renvers%C3%A9%20(1).png)
Here are the steps to follow to configure an automated survey in the Client satisfaction module.
If you did not set up an automated survey when creating your campaign, you can do so by editing the campaign.
To do so, follow these steps.
Primary and secondary email address
1. From your ProgressionLIVE account, click on the Satisfaction tab to access the module.
2. In the summary card of the campaign you want to edit, click on the edit icon (the 4th).
-
- You can also click on the campaign name, then click on the Edit tab.
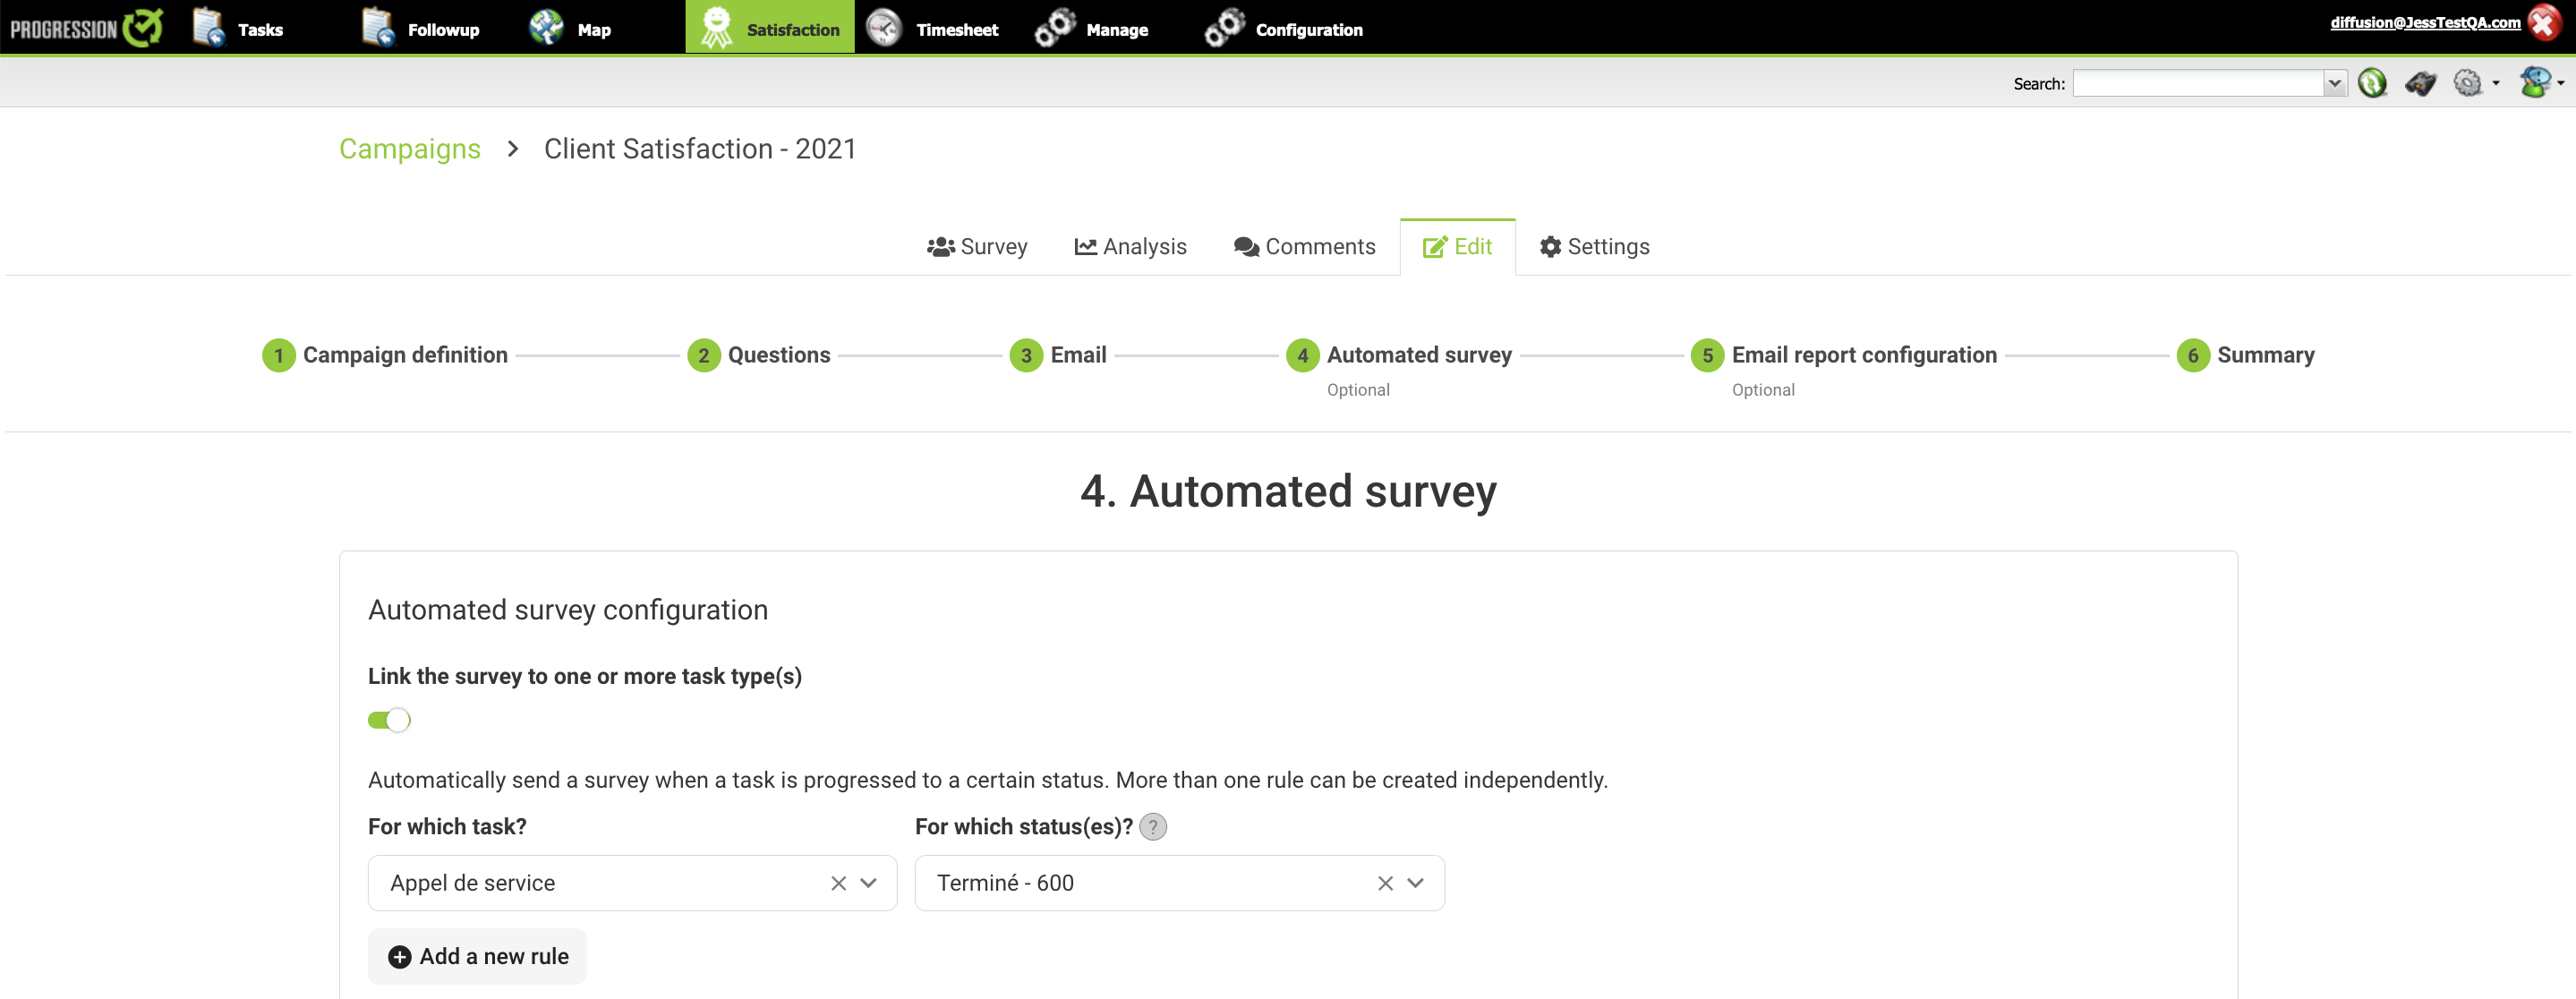
3. Click on the Automated survey tab.
4. Check the option "Link the survey to one or more task (s)".
5. Select the task type to which you want to link the survey.
-
- Example : Service Call
- You can select other task types by clicking Add new rule.
6. Select the status or statuses that should trigger the sending of the survey.
-
- Example : 600 - Completed and 610 - Completed without signature
- The survey will be sent only once per email address, when the task is progressed for the first time to one of the selected statuses.
- Example:
- Your automated survey configuration is based on the Service Call task type and the statuses 600 - Completed and 610 - Completed (to recontact).
- When you progress a Service Call task to 600, the survey will be sent to the task client.
- If you progress this task to 610, the survey will not be sent again.
- Example:
- If several sending scenarios are possible, as in the previous example, it is interesting to select several states.
- Other example :
600 - Completed
610 - Completed without signature.
- Other example :
7. Add a delay to be observed before sending the survey. (optional)
-
- Example: for the value 00:12:00, the survey will be sent 12 hours after the task progresses to one of the previously selected statuses.
8. Add the mute period to respect. (optional)
-
- The mute period prevents more than one survey from being sent to the same email address, regardless of the type of task, within a single campaign.
- This option is designed to avoid spamming your clients if you do multiple jobs for them.
- See example below.
- You survey clients for Service Calls and Installation type tasks.
- You have to do multiple jobs for the same client within the same month.
- You don't want the survey to be sent for all Service Calls and Installation tasks, but rather once a week only.
- You can set a 7-day mute period, so the client will receive a maximum of 1 survey per 7-day period.
9. Select the primary email address to send the survey to, then the secondary email address. The secondary email will be used if the field selected as primary email is empty.
-
- Example :
Primary email : email address in the client file
Secondary email : email address in the location file
- Example :
Your automated survey is now configured.
When you will progress a task corresponding to the previous configurations (task type and status), the survey will be sent to the email address configured in the field selected as primary email (ex. The email address of the task client).
By using the automated survey, you will be able to view the results of a specific task.