.png?height=120&name=Logotype+Lettrine%20-%20Horizontal%20-%20Renvers%C3%A9%20(1).png)
Create your time entries on mobile
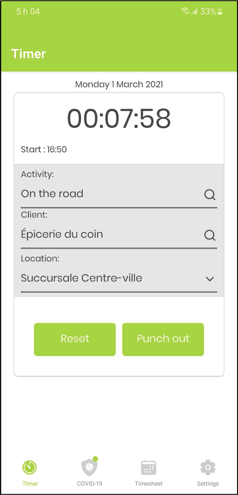
Start a time entry
1. Log in to the ProgressionPUNCH app.
2. Select an Activity.
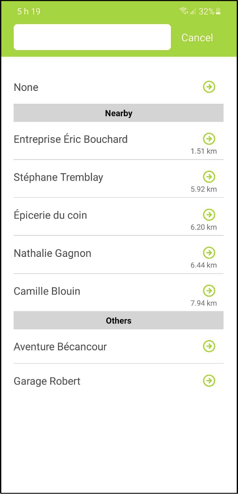
3. Select a Client.
-
If your mobile device's location is enabled and you have authorized Punch to use your location, the distance between you and the various clients will be displayed.
4. Select a Location, if necessary.
-
If your mobile device's location is enabled and you have authorized Punch to use your location, the distance between you and the various locations will be displayed.
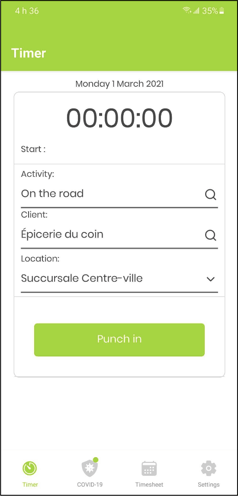
Your time entry is now started.
Close a time entry
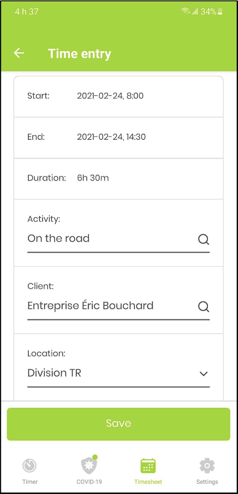
1. Tap Punch out.
2. Validate the information entered (Activity, Client, Location).
3. Leave a comment, if necessary.
4. Tap Save.
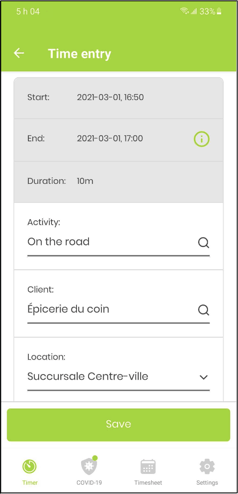
Your time entry is now closed and saved.
Note: It is possible to configure the rounding of time (e.g. per minute or every 1, 5, 10, 15, 30, 60 minutes: by default, to the higher unit or to the lower unit).
For more details, see this article.
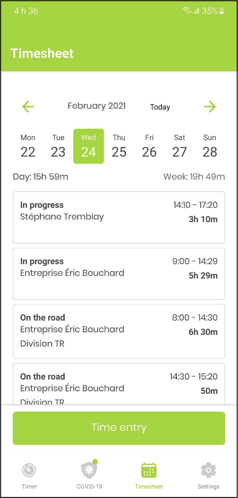
Consult or edit a time entry
You can view your time entries by tapping the Timesheet icon in the menu at the bottom of the screen and selecting the desired day.
If you edit your time entry, don't forget to tap Save.